-
Follow the instructions below:
Step 1: Change Page Layout-
- Sign In to Schoolwires
- Access the Site Manager from User Options
- Choose User Option, Site Manager
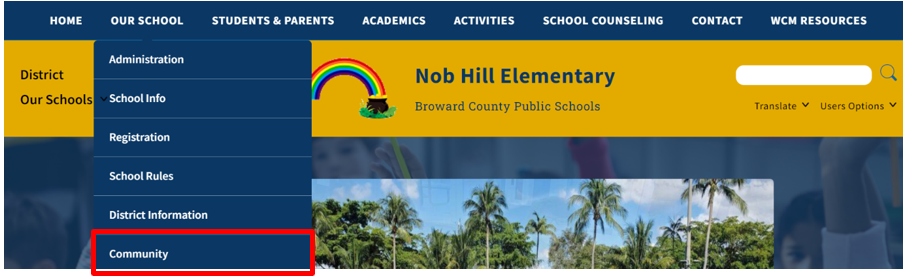
- Choose Our School under Site & Channels
- Select the Community page
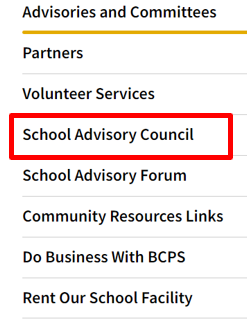
- Select the School Advisory Council (SAC) page
- Click on the Edit Page icon
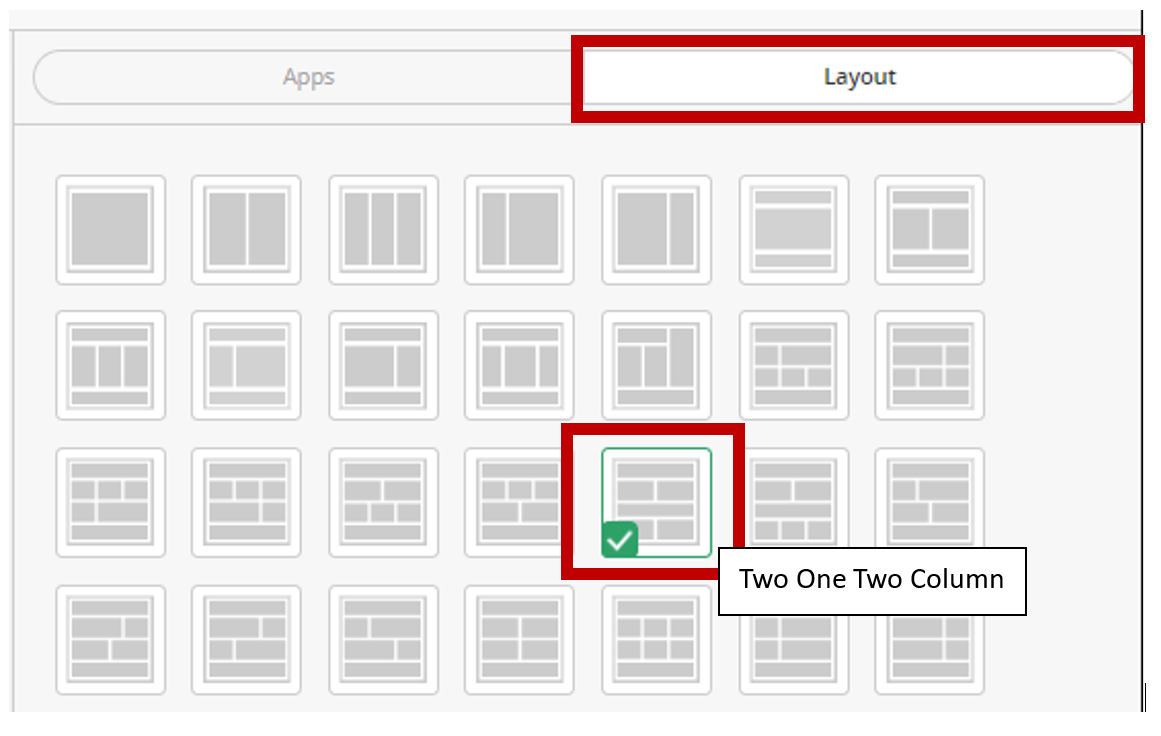
- In the left column, click on Layout
- Choose the layout labeled Two One Two Column

Step 2: Organize Apps
Section 1
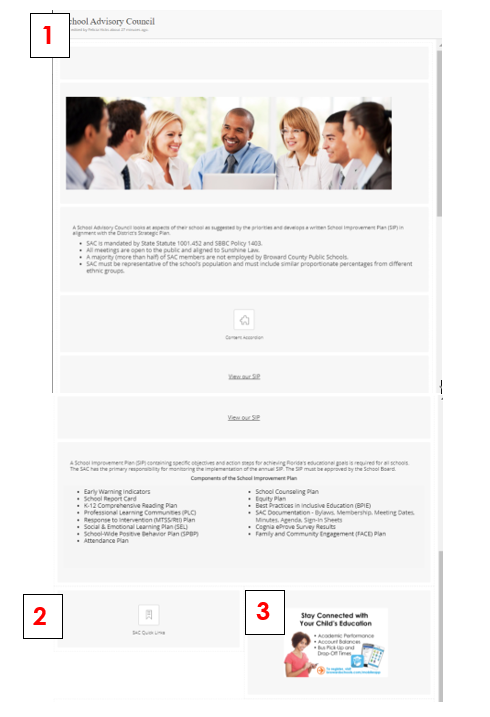
Review the layout guide below and follow the steps to place the apps properly.
- Drag the School Advisories Council (SAC) image under the Advisories and Committees content app, in section 1.
- Drag School Advisories Council Verbiage under Advisories and Committees image, in section 1.
- Drag Content Accordion under the School Advisories Council content App in section 1.
- Drag View our SIP app under the Content Accordion app in section 1.
- Drag the School Improvement Plan app under View our SIP app in section 1.
Section 2
- Drag SAC Quick Links to section 2 and Download BCPS Free Mobile App to section 3.
- Delete the Divider App.
Step 3: Update content
-
- On the Content Accordion App. Click the green pencil to edit.
- If you have a current story for 2023/24, move on to instruction 3. If you do not have a 2023/24 Meeting and Agenda story, click New Story to add a new story. Click the access instructions to add the 2023/24 Meetings and Agenda Table.
- After adding the table to the page, complete the table by adding the remaining months. If you need assistance with the table, submit a Remedy/Helix Ticket
- Change the Story Title in the Title Field from "2023/24 Meetings and Agendas" to “2023/24 Agendas and Minutes”.
- Deactivate all old content for the 2022/23 and 2021/22 school years. Only leave information for the current school year.
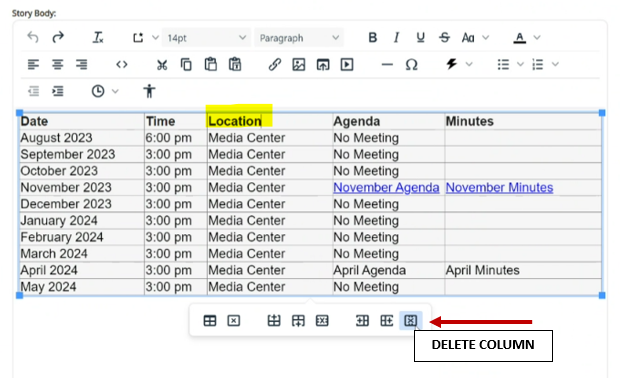
- Click Edit 2023/24 Agendas and Minutes to make changes to the table.
- Place your cursor in the Location column
- Select "Delete Column" and delete the "LOCATION" column
- 8. Upload and post the SAC Meeting Minutes, and Agendas for the 2023/24 school year.
- 9. Save work
- 10. Click the purple X
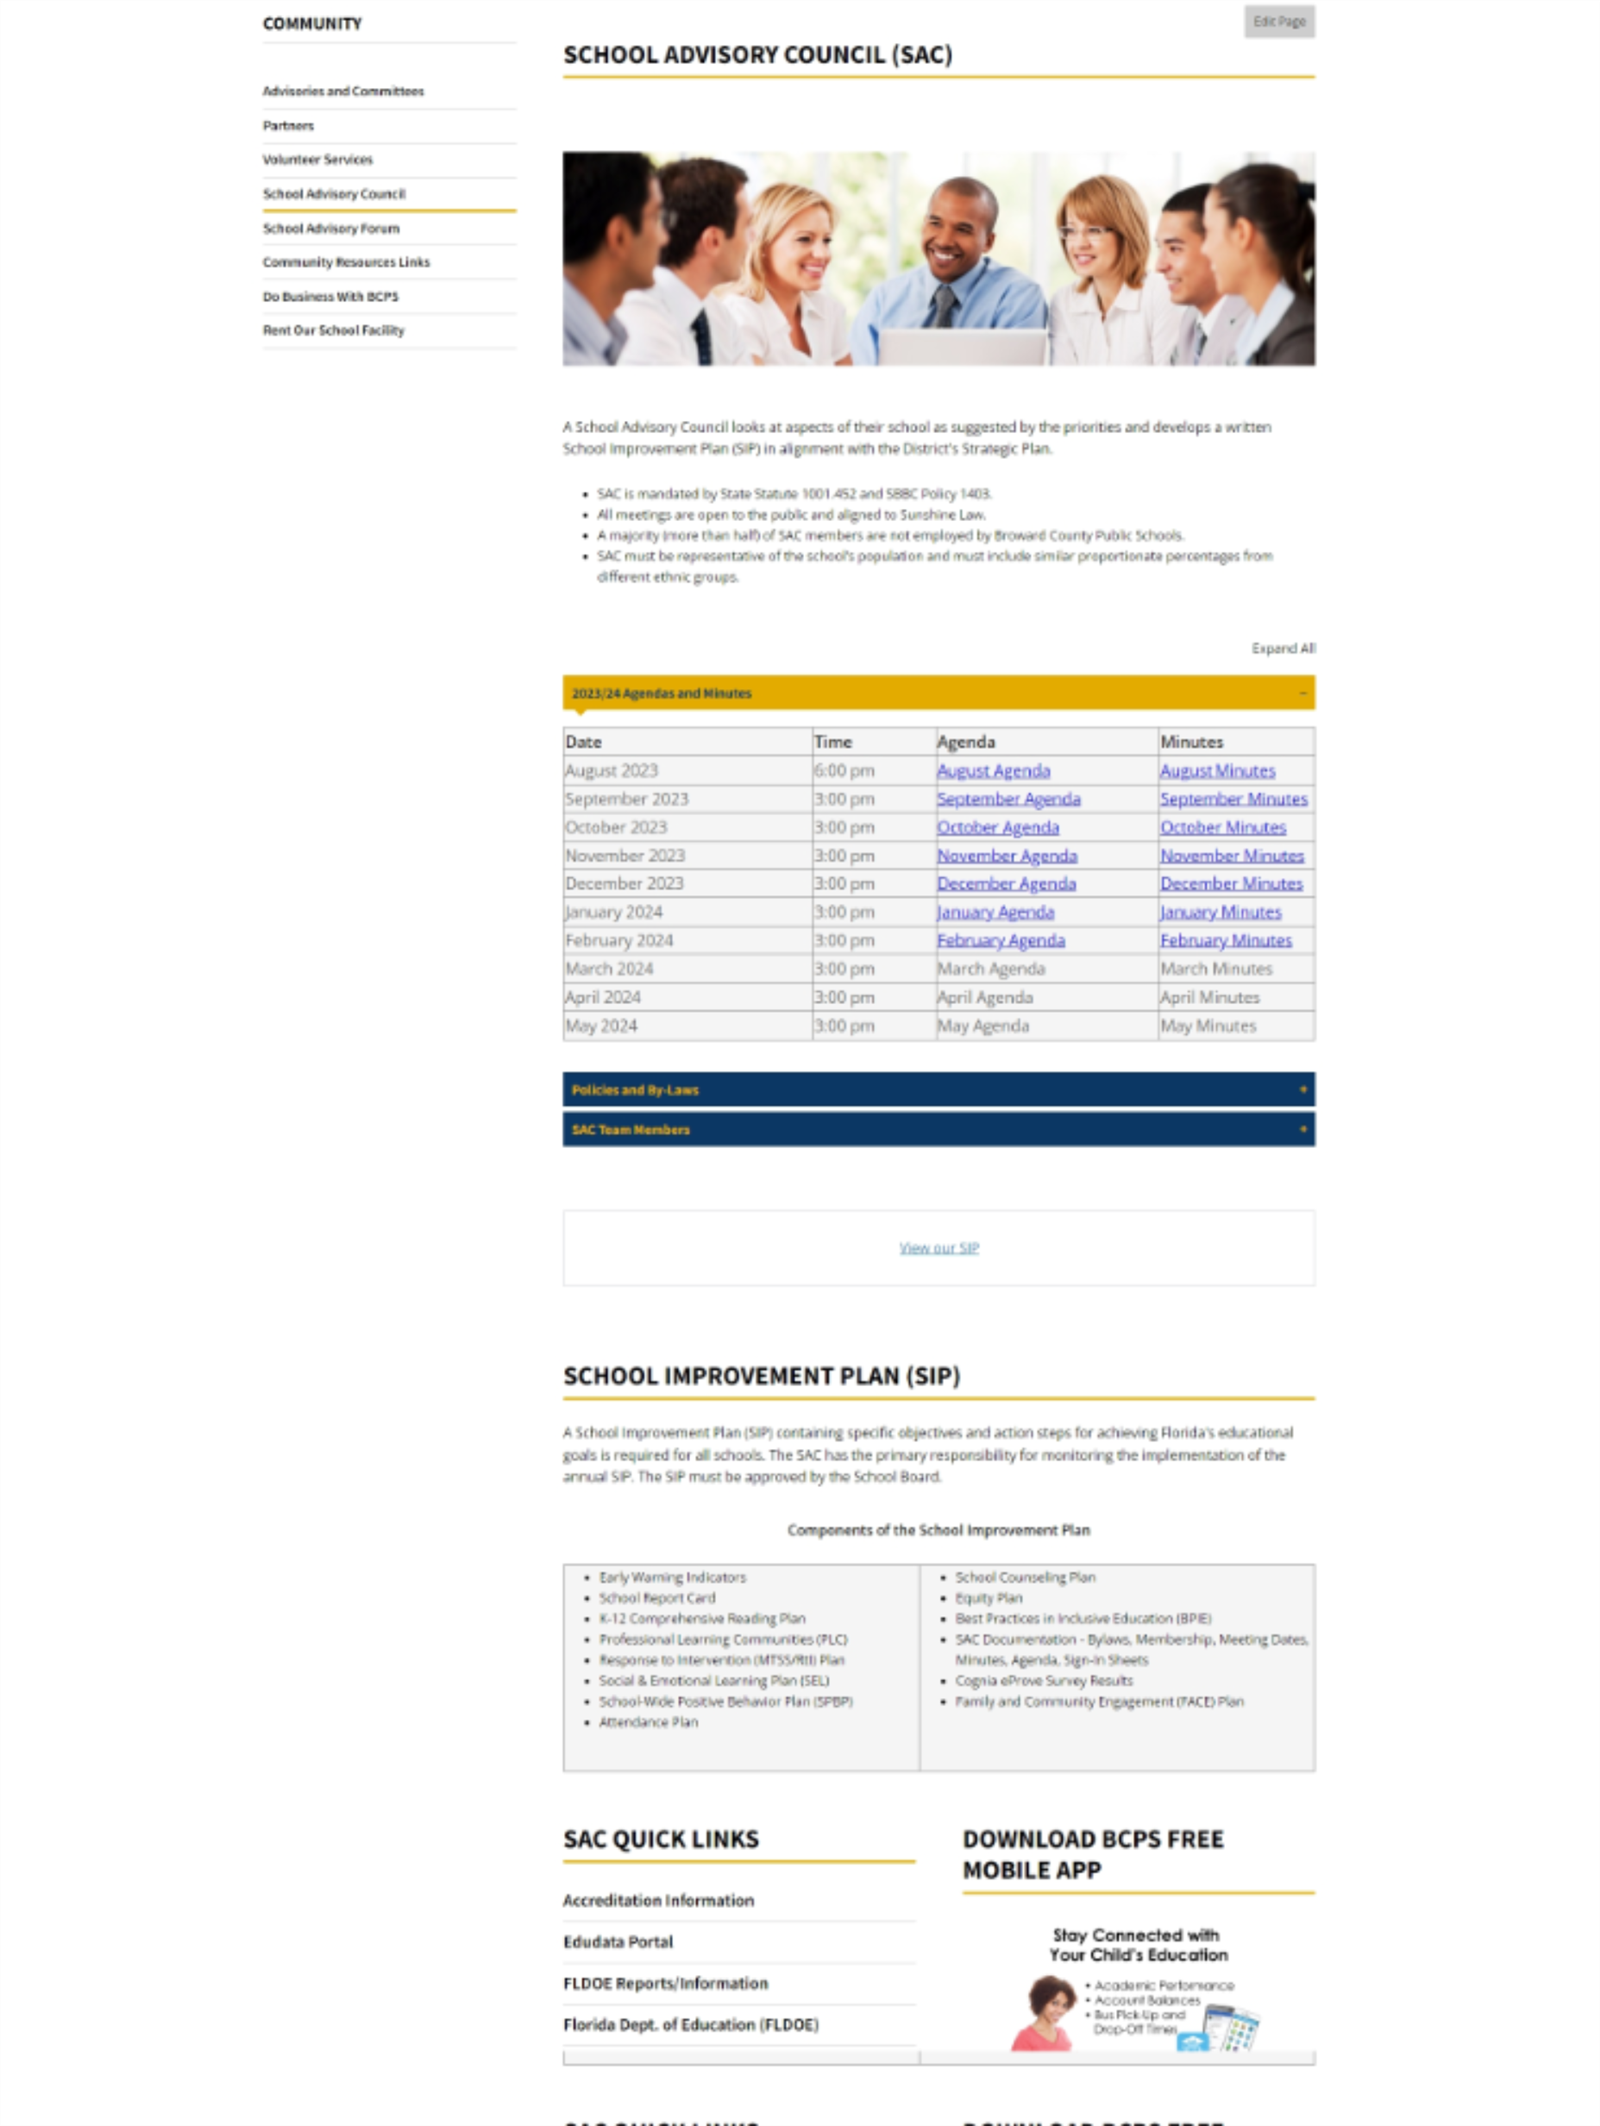
- 11. Review your work. Refresh the site and see the example below.
If you have questions or need assistance, contact the IT Service Desk at 754-321-0411.
-
-
Follow the instructions below:
- Sign In to Schoolwires
- Access the Site Manager from User Options
- Choose User Option, Site Manager
- Go to the left column and select Our School
- Select Community
- Select School Advisory Forum
Step 1 - Change Page Layout- In the left column, click on Layout
- Choose the layout labeled Two One Two Column
Step 2 - Organize Apps
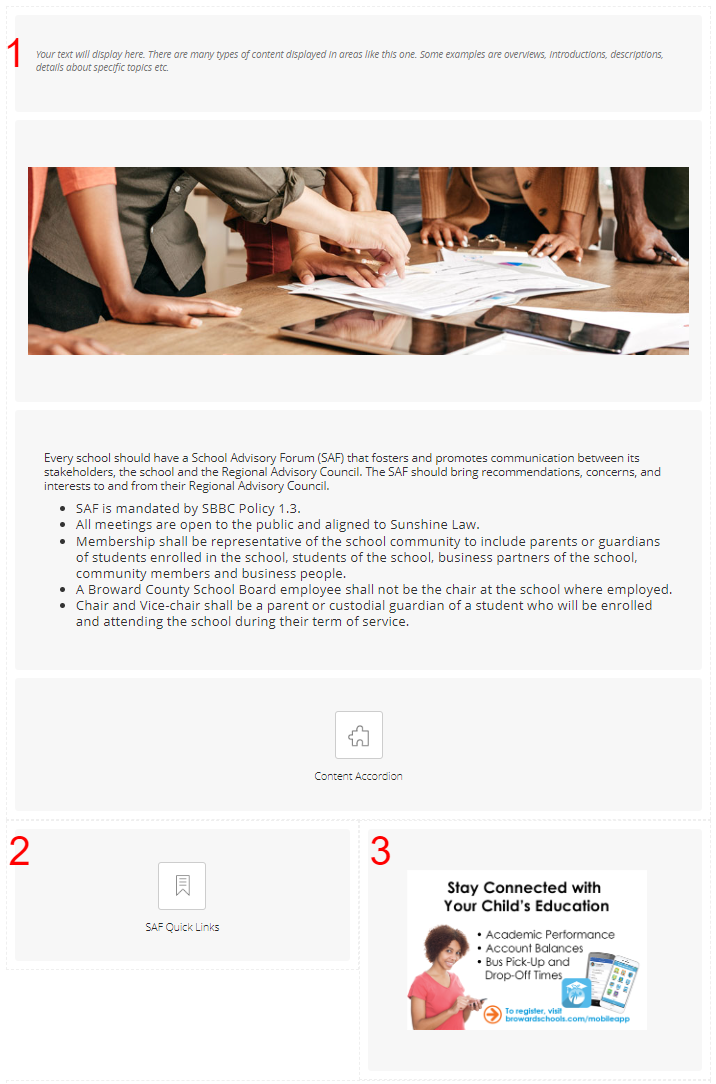
Section 1
Review the layout guide below and follow the steps to properly place the apps.
-
- Drag School Advisories Forum (SAF) image under the Advisories and Committees Content app, in section 1.
- Drag School Advisory Forum Verbiage under the School Advisory Forum Image, in section 1
- Drag Content Accordion under the School Advisories Forum content App in section 1.
Section 2
-
- Drag SAF Quick Links to section 2
Section 3
-
- Drag Download BCPS Free Mobile App to section 3.
- Delete the Divider App
Step 3: Update content
-
-
- On the Content Accordion App. Click the green pencil to edit.
- If you have a current story for 2023/24 move on to instruction 3. If you do not have a 2023/24 Meeting and Agenda story, click New Story to add a new story. Click the access instructions to add the 2023/24 Meetings and Agenda Table.
- After adding the table to the page, complete the table by adding the remaining months. If you need assistance with the table, submit a Remedy/Helix Ticket
- Change the Story Title in the Title Field from "2023/24 Meetings and Agendas" to “2023/24 Agendas and Minutes”.
- Deactivate all old content for the 2022/23 and 2021/22 school years. Only leave information for the current school year.
- Click Edit 2023/24 Agendas and Minutes to make changes to the table.
- Place your cursor in the Location column
- Select "Delete Column" and delete the "LOCATION" column
- Move the cursor into the MINUTES column to insert a new column.
- Upload and post the SAF Meeting Minutes and Agendas for the 2023/24 school year.
- Save work
- Click the purple X
- Review your work. Refresh the site and ensure your page layout looks like the example below.
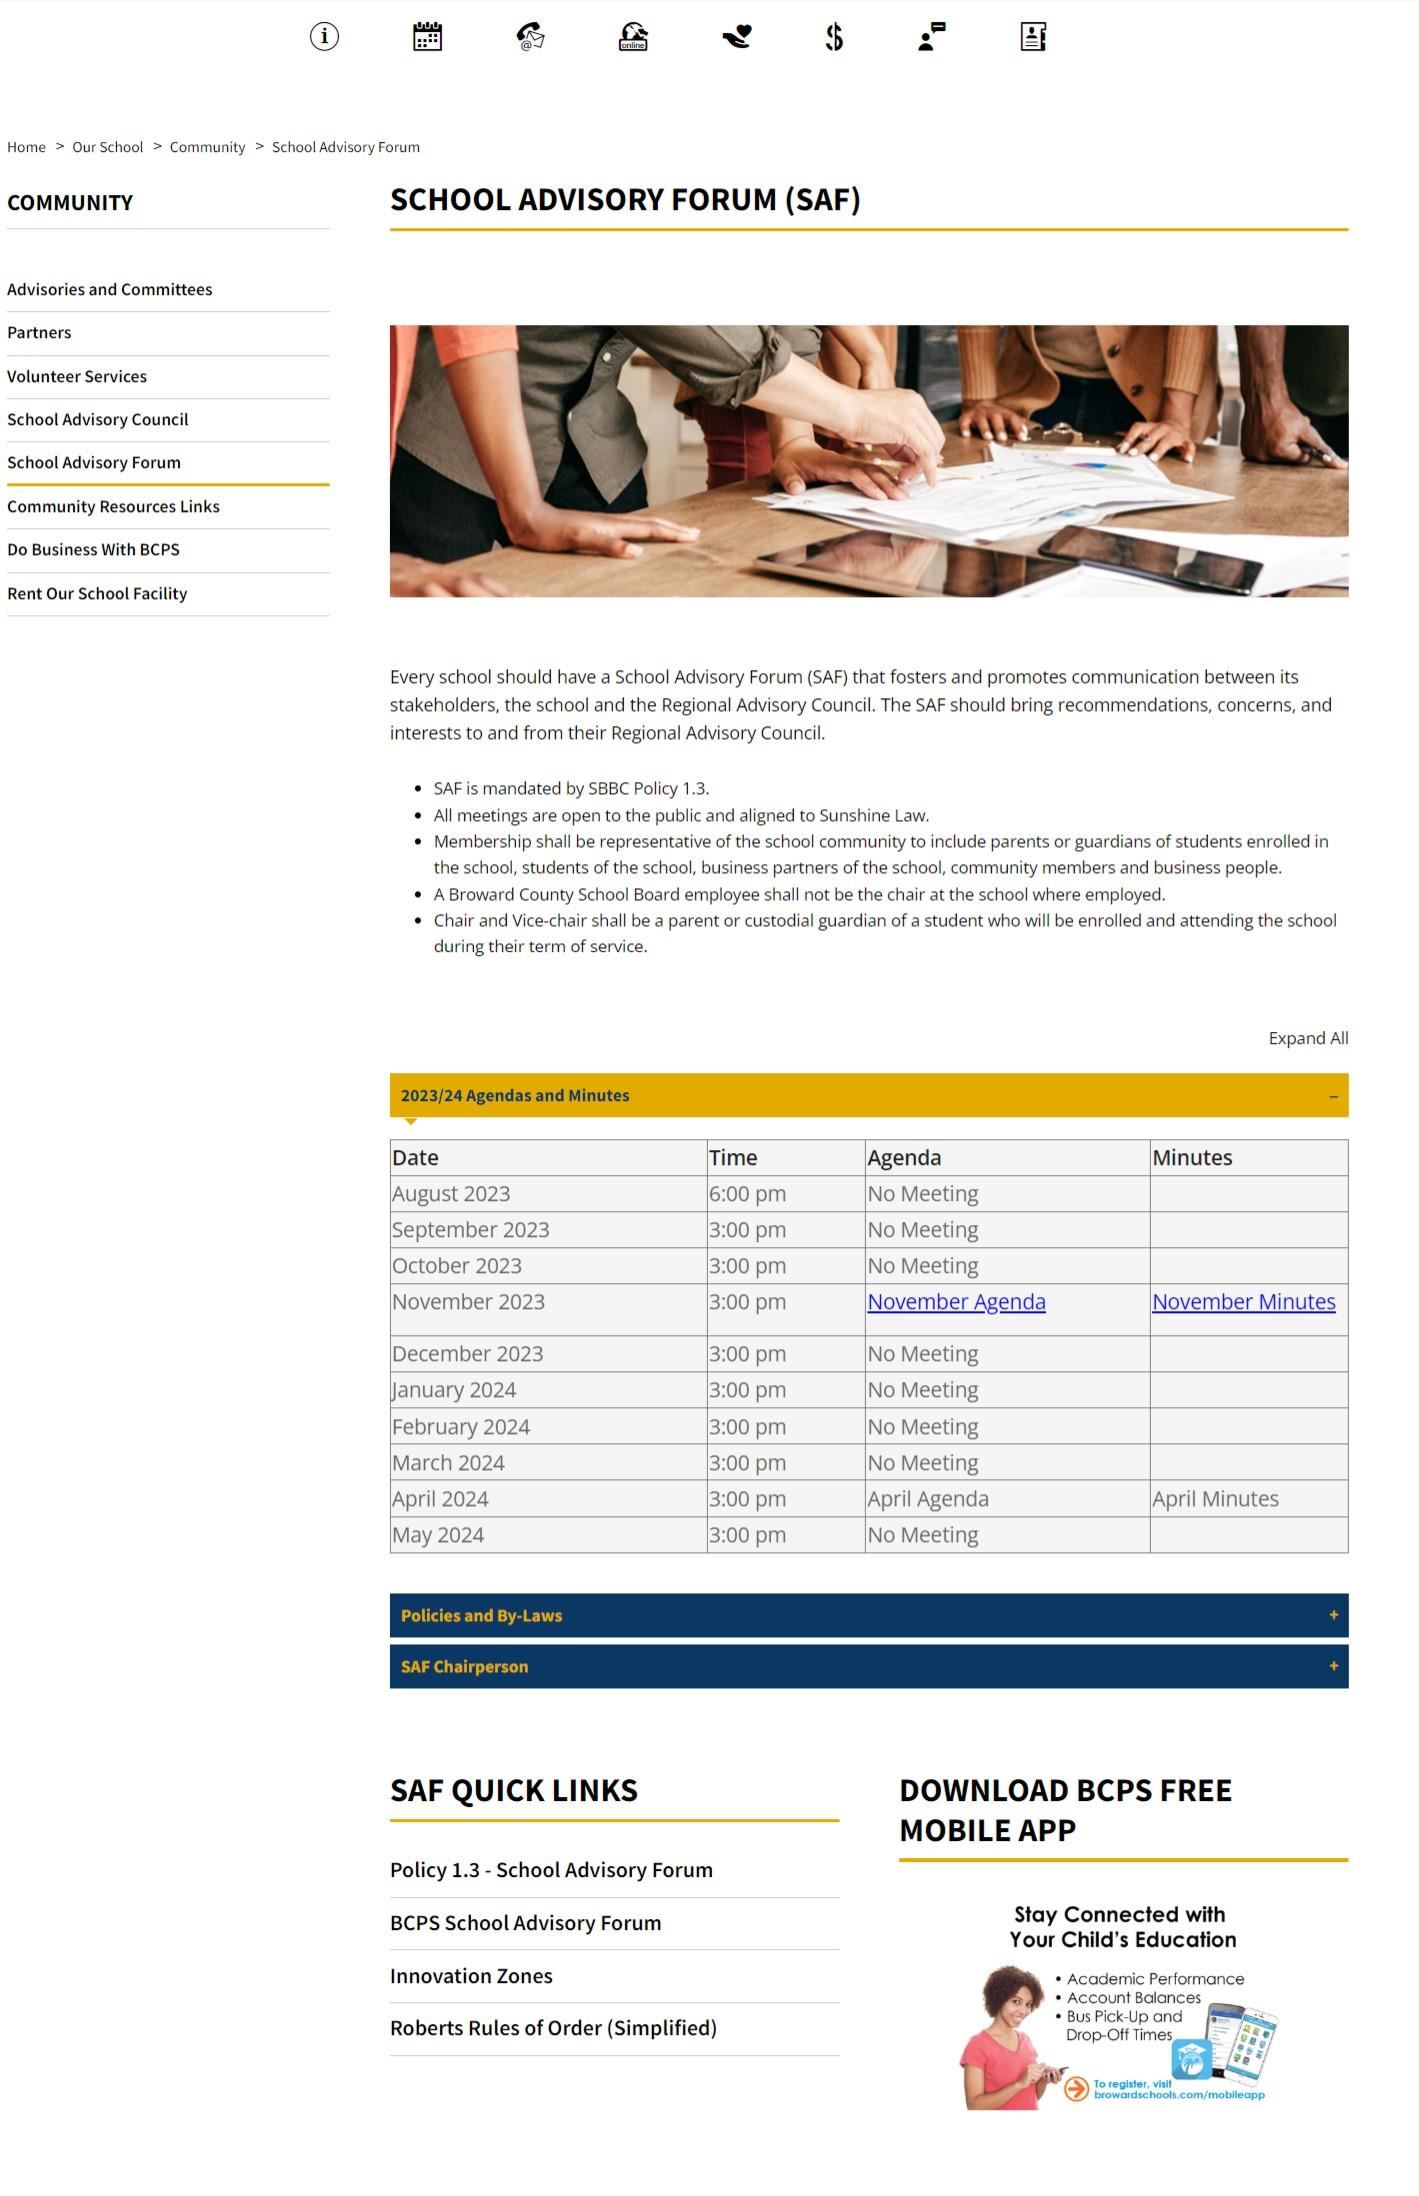
If you have questions or need assistance, contact the IT Service Desk at 754-321-0411.
-
-
Creating a New Page for College and Career Readiness
- Creating a New Page
- Make sure you are logged onto your website.
- Select User Options.
- Select the Academic under Site & Channels list on the left side of the screen.
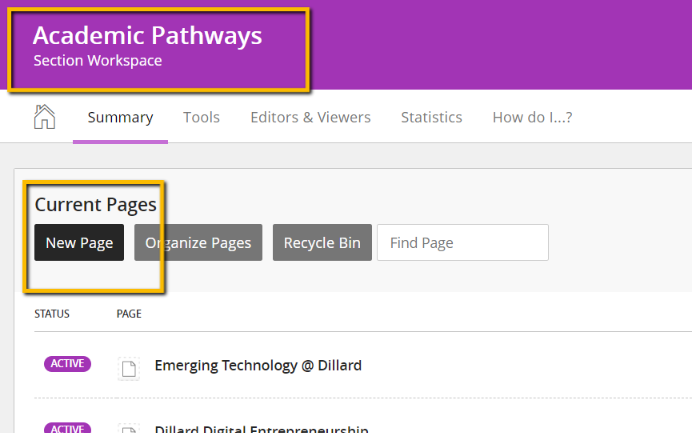
- Select the Academic Pathways Section.
- Select the New page.
-
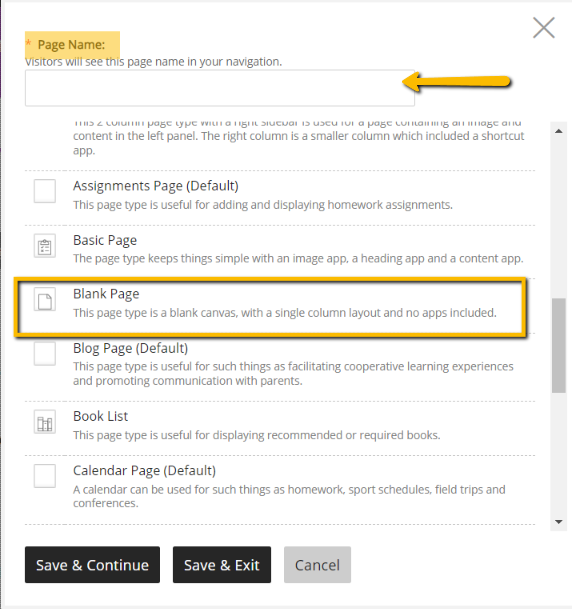
- The page will be College and Career Readiness.
-
- Select Blank Page
- Select Save and Continue.
2- Change the page layout to the Right SideBar
-
- On the right side of the page, select the Layout option and make the change to Right Sidebar Layout (See the Image Below)

3- Adding shared apps to the Page
-
- Under the apps section on the page.
- Select Use Existing.
- In the drop-down, select Content.
- In the Search type Xello, and make sure the X is capitalized.
- Drag the app to the center column of the page.
- Select Use Existing.
- In the drop-down, select Content Accordion – Custom Version.
- In the Search type What Can Xello Do.
- Drag the app to the center column and place it below the existing Xello app.
- Select Use Existing.
- In the drop-down, select Site Shortcuts.
- In the Search type Xello Middle School Resources
- Drag the app to the right column and place it on top.
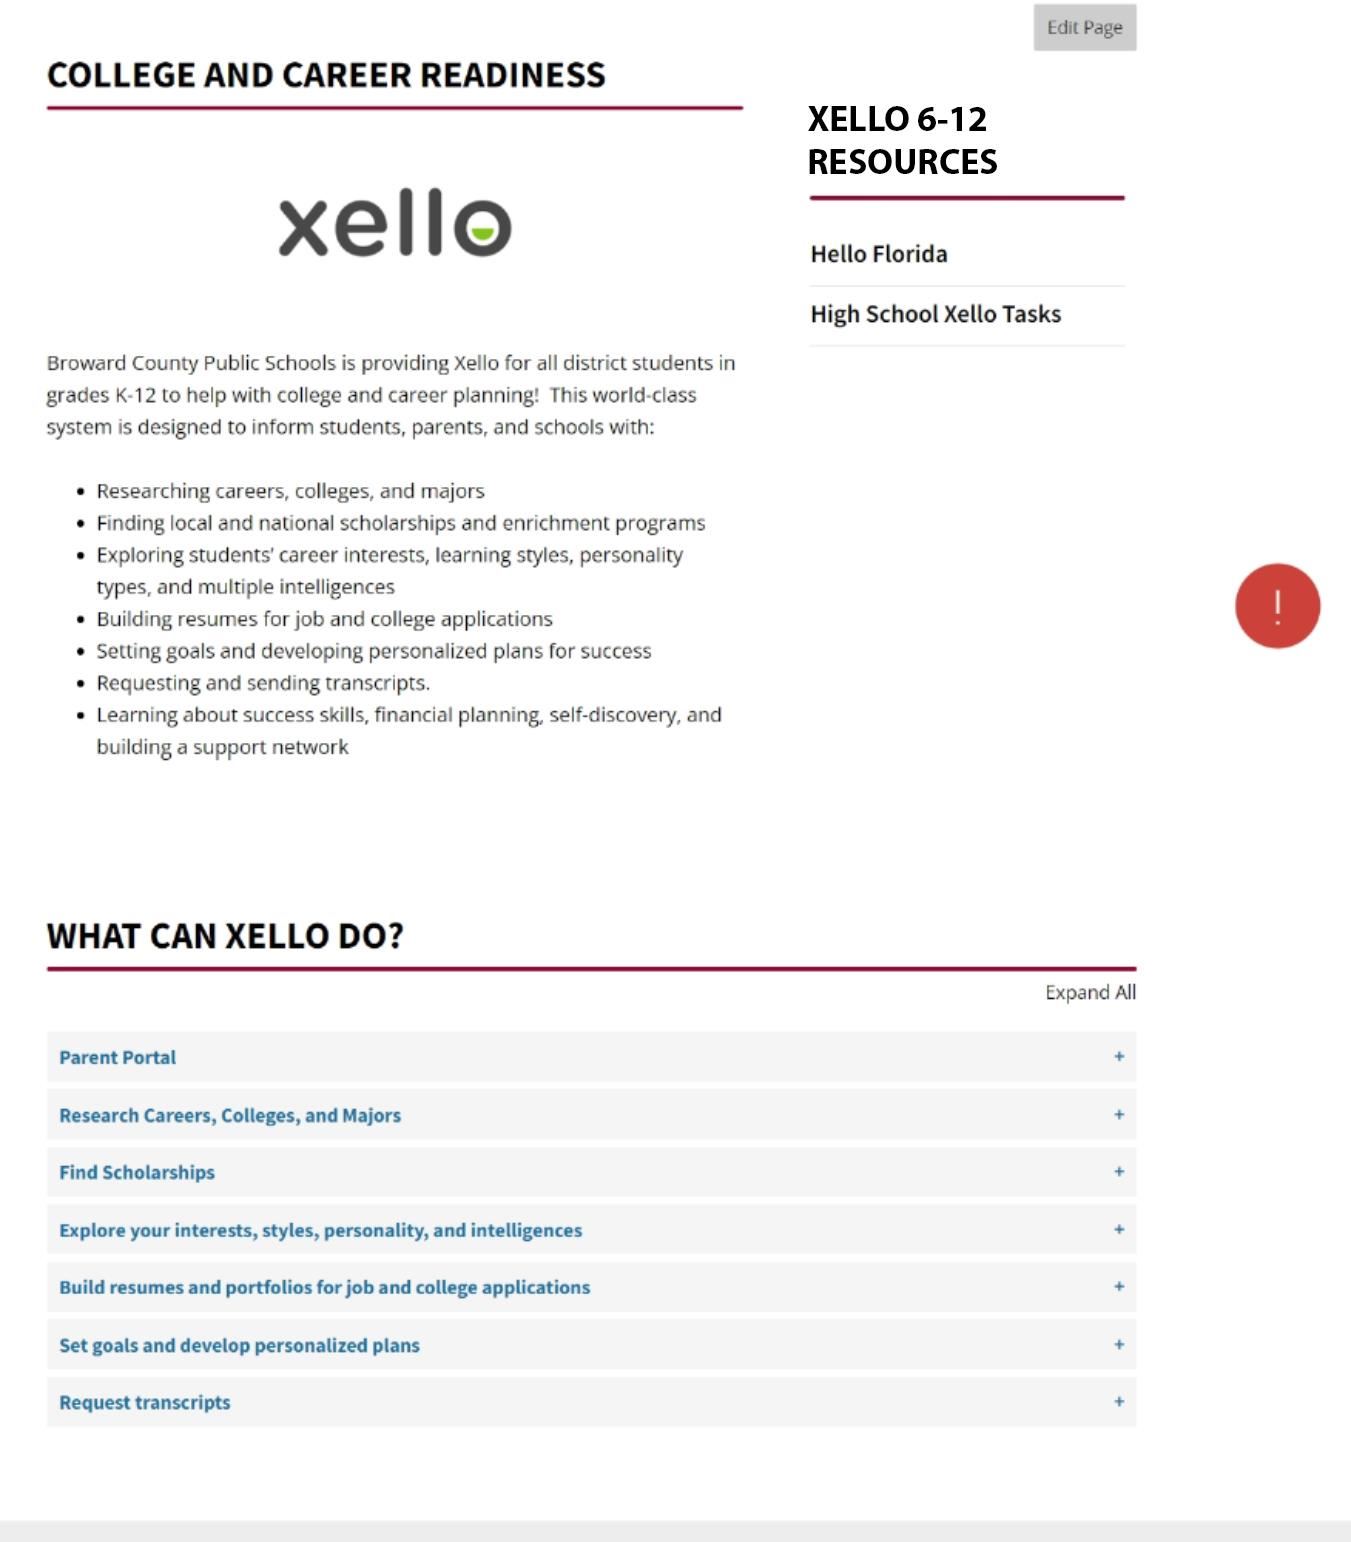
- Review and check your work. Your new College and Career Readiness page should look like the image below.
4- Home page banner/Xello Image update
a. Link the Xello multimedia image to your new College and Career Readiness page.
Page Example

-
Changing Scholarship information (For 6–12 Schools)
- Rename the page from Scholarship Information to College and Career Readiness
- Make sure you are logged onto your website.
- Select User Options.
- Select the School Counseling Channel from the Site & Channels list on the left side of the screen.
- Select the BRACE Section.
- Select the Scholarship Search Page.
- Select Actions, Edit Page and change the page name to College and Career Readiness
- Change the page layout to the Right Side Bar
- On the right side of the page, select the Layout option and make the change to Right Sidebar Layout (See the Image Below)

- Removal of Naviance Information
-
- Make sure you are still on the College and Career Readiness Page.
- REMOVE the banner at the top of the page.
- Delete the banner app from the page.
- REMOVE the two informational apps on the center column of the page referring to Naviance (Scholarship information & Naviance Student).
- Delete Scholarship information.
- Delete Naviance Student.
- Adding 3 Xello Apps to the Page using a department shared EXISTING app
- Under the apps section on the page.
- Select Use Existing.
- In the drop-down, select Content.
- In the Search type Xello, and make sure the X is capitalized.
- Drag the app to the center column of the page.
- Select Use Existing.
- In the drop-down, select Content Accordion – Custom Version.
- In the Search type What Can Xello Do.
- Drag the app to the center column and place it below the existing Xello app.
- Select Use Existing.
- In the drop-down, select Site Shortcuts.
- In the Search type Xello Helpful Links
- Drag the app to the right column and place it on top.
- Review and check your work. Your new College and Career Readiness page should look like the image below.
5- Home page banner/Xello Image update
a. Link the Xello multimedia image to your new College and Career Readiness page.
Page example
-
Changing Scholarship information (For High Schools)
- Rename the page from Scholarship Information to College and Career Readiness
- Make sure you are logged onto your website.
- Select User Options.
- Select the School Counseling Channel from the Site & Channels list on the left side of the screen.
- Select the BRACE Section.
- Select the Scholarship Search Page.
- Select Actions, Edit Page, and change the page name to College and Career Readiness
- Change the page layout to the Right Side Bar
- On the right side of the page, select the Layout option and make the change to Right Sidebar Layout (See the Image Below)

- Removal of Naviance Information
- Make sure you are still on the College and Career Readiness Page.
- REMOVE the banner at the top of the page.
- Delete the banner app from the page.
- REMOVE the two informational apps on the center column of the page referring to Naviance (Scholarship information & Naviance Student).
- Delete Scholarship information.
- Delete Naviance Student.
- Adding 3 Xello Apps to the Page using a department's Shared/Existing app
- Under the apps section on the page.
- Select Use Existing.
- In the drop-down, select Content.
- In the Search type Xello, and make sure the X is capitalized.
- Drag the app to the center column of the page.
- Select Use Existing.
- In the drop-down, select Content Accordion – Custom Version.
- In the Search type What Can Xello Do.
- Drag the app to the center column and place it below the existing Xello app.
- Select Use Existing.
- In the drop-down, select Site Shortcuts.
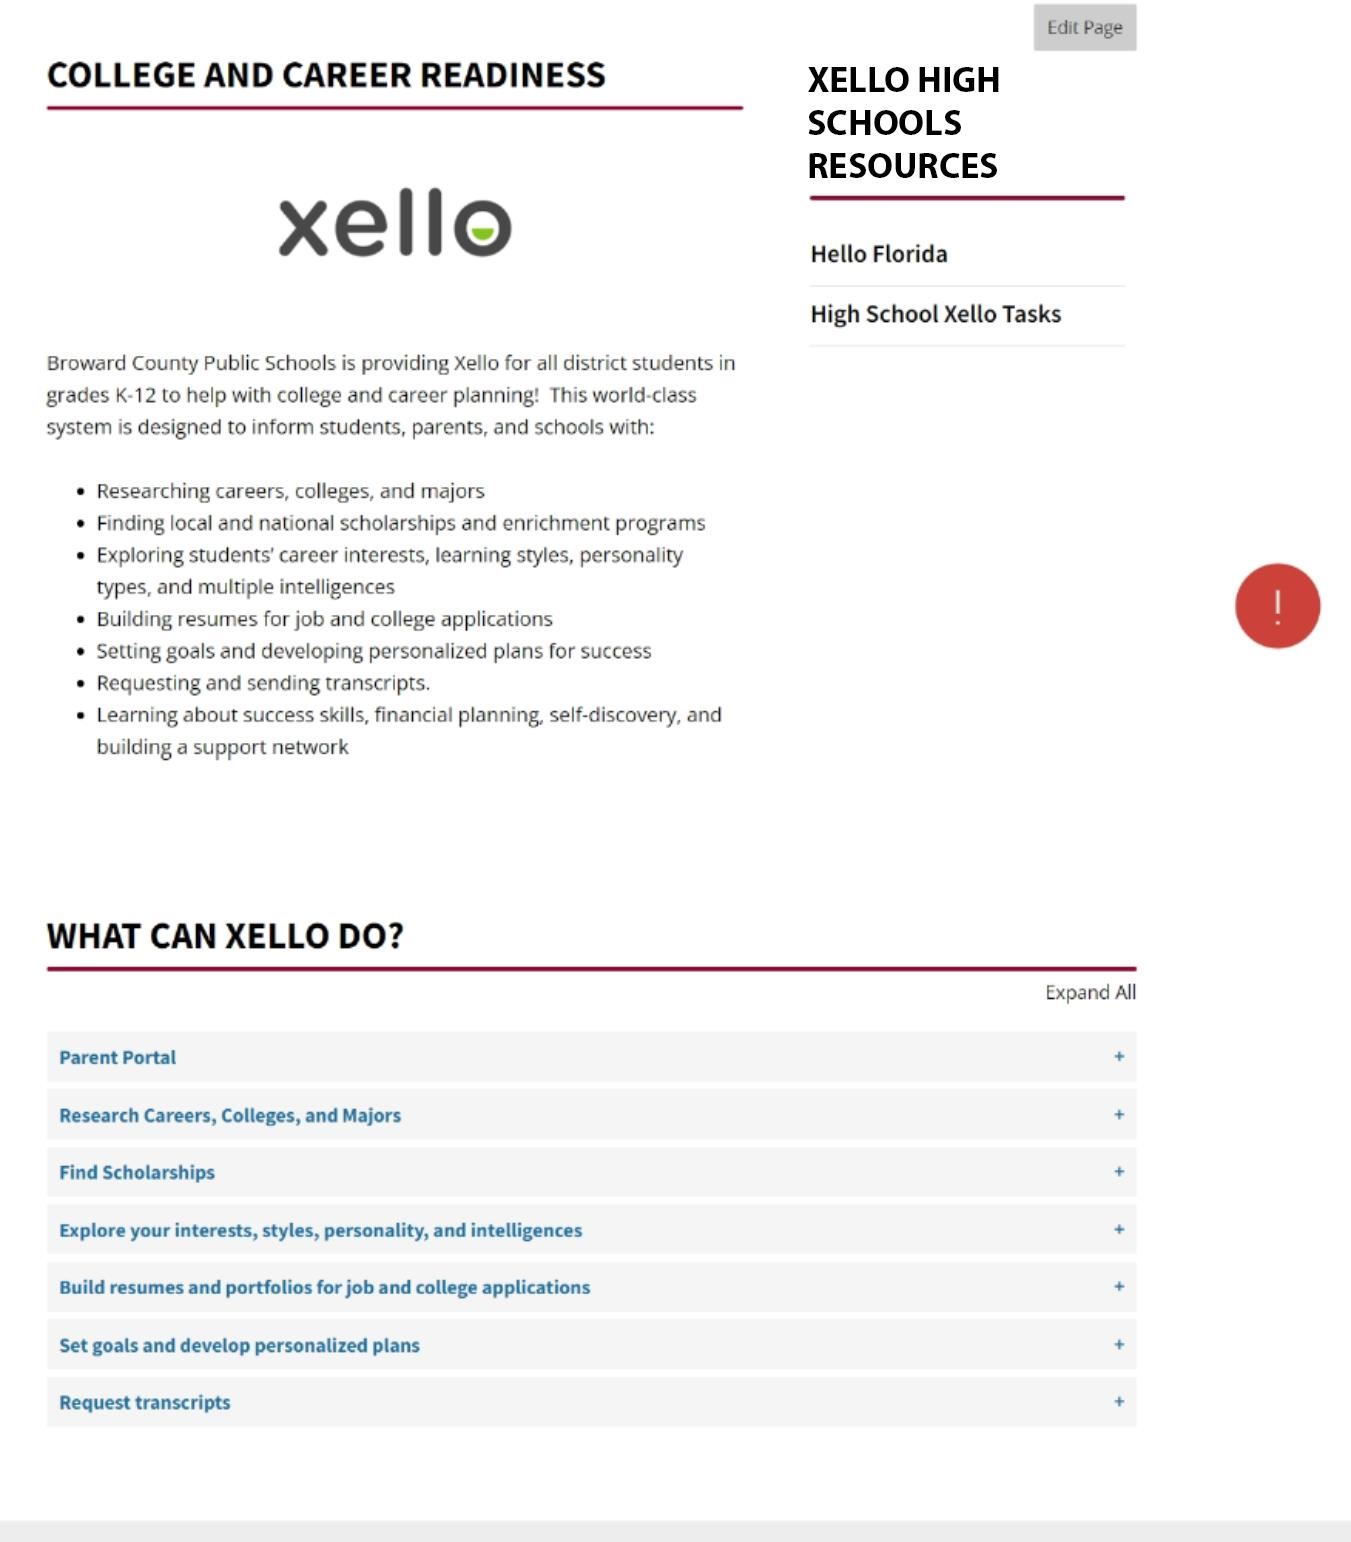
- In the Search type Xello for High School Resources
- Drag the app to the right column and place it on top.
- Review and check your work. Your new College and Career Readiness page should look like the image below.
5- Home page banner/Xello Image update
a. Link the Xello multimedia image to your new College and Career Readiness page.
Xello Page Example